If there is information you want to capture for new cases created on the New Request page and it’s not already an option that can be enabled under our Request Fields section, then you can create your own custom fields. For example, MorTrack does not currently have a field built in for doctor, but if that is information you want entered for your new cases, you can create a custom “Doctor” field.
The information entered in custom fields will be saved in the case information once the case is saved and created.
Users with the Admin role can access Custom Fields by going to the Administration menu, clicking on Settings, then clicking on Custom Fields.
Creating Custom Fields
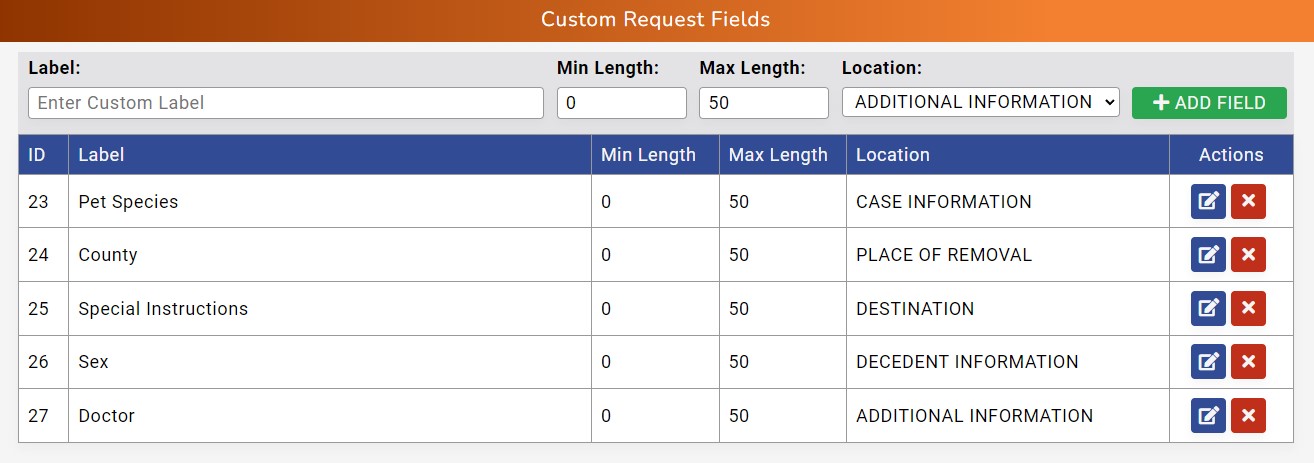
Each Custom Field is is comprised of the following parts:
ID: An identification number MorTrack automatically creates when a Custom Field is saved. This number won’t have a particular function for your use, nor will it appear on the New Request page.
Label: The name of the custom field. This is the label applied to the field and what will be visible on the New Request page.
Min Length and Max Length: The numbers entered here can create a minimum or maximum number of characters that can be typed into the custom field. This may be useful if the field is intended for something such as a social security number or phone number, which always have a certain number of digits.
Location: The selection made here determines which section of the New Request page that the custom field appears under. You can use this to group the custom field under the section that makes the most sense, making it easier for any users who are creating your requests.
After filling out the above selections, you can click on +Add Field to save the custom field. All active custom fields will appear listed just underneath this section.
To make any changes to an existing custom field, click on the blue Edit button. After clicking on the edit button, you’ll then have a green Save button for saving changes made and a red Cancel button that can revert any unsaved changes.
To delete a field so that it no longer appears on the New Request page, click on the red Delete button to the right of the intended custom field.